【个人】Spring Boot使用过程中知识点总结
目录
[TOC]
Spring Boot项目基本结构
com
 +- example
     +- myproject
         +- Application.java
         |
         +- domain
         |   +- Customer.java
         |   +- CustomerRepository.java
         |
         +- service
         |   +- CustomerService.java
         |
         +- web
             +- CustomerController.java
Application.java是应用的入库,一般放在根目录。
所有的资源文件都统一放在resources目录下,结构如下:
static
 +- css
 |   +- style.css
 |   +- common.css
 +- js
 |   +- index.js
 +- img
     +- img.png

templates
 +- index.html
 |
 +- pages
 |   +- page.html
我们所有的配置文件都默认放在在resources目录下
像CSS样式表、JavaScript文件、图片等静态资源都放在static目录下,HTML页面放在template目录下
Entity实体注意点
entity实体的@Column注解问题:建议下划线分割。
例如数据表中有productName字段,实体中应当这样写
@Column(name = "productname")
private String productName;
或者
@Column(name = "product_name")
private String productName;
Spring Boot JPA 命名规则
以下表格摘录自官方文档
| Keyword | Sample | JPQL snippet |
|---|---|---|
| And | findByLastnameAndFirstname | … where x.lastname = ?1 and x.firstname = ?2 |
| Or | findByLastnameOrFirstname | … where x.lastname = ?1 or x.firstname = ?2 |
| Between | findByStartDateBetween | … where x.startDate between 1? and ?2 |
| LessThan | findByAgeLessThan | … where x.age < ?1 |
| GreaterThan | findByAgeGreaterThan | … where x.age > ?1 |
| After | findByStartDateAfter | … where x.startDate > ?1 |
| Before | findByStartDateBefore | … where x.startDate < ?1 |
| IsNull | findByAgeIsNull | … where x.age is null |
| IsNotNull,NotNull | findByAge(Is)NotNull | … where x.age not null |
| Like | findByFirstnameLike | … where x.firstname like ?1 |
| NotLike | findByFirstnameNotLike | … where x.firstname not like ?1 |
| StartingWith | findByFirstnameStartingWith | … where x.firstname like ?1 (parameter bound with appended %) |
| EndingWith | findByFirstnameEndingWith | … where x.firstname like ?1 (parameter bound with prepended %) |
| Containing | findByFirstnameContaining | … where x.firstname like ?1 (parameter bound wrapped in %) |
| OrderBy | findByAgeOrderByLastnameDesc | … where x.age = ?1 order by x.lastname desc |
| Not | findByLastnameNot | … where x.lastname <> ?1 |
| In | findByAgeIn(Collection ages) | … where x.age in ?1 |
| NotIn | findByAgeNotIn(Collection age) | … where x.age not in ?1 |
| True | findByActiveTrue() | … where x.active = true |
| False | findByActiveFalse() | … where x.active = false |
对于Dao层接口的扩展
一般我们的Dao层接口继承JpaRepository接口,该接口提供了基本的CURD操作,但是我们如果想更加细化的进行数据库操作,如何处理?
新建一个接口,然后继承该接口,编写具体实现即可
例如:
public interface DemoDaoI extends JpaRepository<TDemo, String> {
    List<TDemo> findByName(String name);
    List<TDemo> findByrecId(String id);
}
DemoDaoI接口继承了JpaRepository接口,此时我们再定义一个DemoRepositoryCustom的接口,进行更加个性化、细致化的操作。
注意:接口类名后的
Custom后缀是固定的,不能自定义!,即:xxxxCustom
DemoRepositoryCustom接口:
public interface DemoRepositoryCustom {
    void test();
    String queryAge();
}
DemoRepositoryCustom接口的实现类,DemoRepositoryCustomImpl:
public class DemoRepositoryCustomImpl implements DemoRepositoryCustom {
    @Autowired
    @PersistenceContext
    private EntityManager entityManager;


    @Override
    public void test() {
        List<Object[]> cities = entityManager.createNativeQuery("select name from T_Demo").getResultList();
        for (Object objs : cities) {
            System.out.print("Val:" + objs);
        }
    }

    @Override
    public int queryAge() {
        return 0;
    }
}
调用:
package com.springboot2.controller;

import com.springboot2.dao.DemoDaoI;
import com.springboot2.entity.TDemo;
import org.springframework.beans.factory.annotation.Autowired;

import java.util.List;


@RestController
public class DataController {
    @Autowired
    DemoDaoI demoDaoI;

    @RequestMapping("/demo")
    public List<TDemo> getDemo(String name){
        demoDaoI.test();
        return null;
    }
}
相关参考资料:Spring Boot下如何自定义Repository中的DAO方法
定制Banner
修改Banner信息
我们在启动Spring Boot项目的时候,在控制台会默认输出一个启动图案,如下:
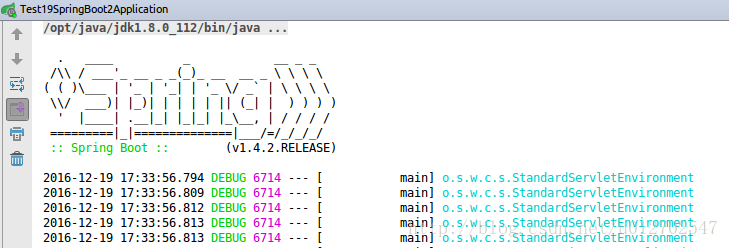
1.在src/main/resources下新建一个banner.txt文档 2.通过http://patorjk.com/software/taag网站生成需要的字符,将字符拷贝到步骤1所创建的txt文档中,比如我这里为Hello Sang!生成字符,如下:
 点击左下角的选择和拷贝按钮,将这个字符拷贝到txt文档中,然后再启动项目,这个时候控制台输出的文本就会自动改变,如下:

关闭Banner
可以修改当然也可以关闭,关闭Banner需要我们稍微修改一下main方法中的代码,如下:
public static void main(String[] args) {
        SpringApplicationBuilder builder = new SpringApplicationBuilder(Test19SpringBoot2Application.class);
        //修改Banner的模式为OFF
        builder.bannerMode(Banner.Mode.OFF).run(args);
}
OK,如此修改之后当我们再次启动Project的时候就看不到Banner了。
Spring Boot配置相关
Spring Boot的配置文件
Spring Boot使用一个全局的配置文件application.properties或者application.yml,配置文件放在src/main/resources目录下。properties是我们常见的一种配置文件,Spring Boot不仅支持properties这种类型的配置文件,也支持yaml语言的配置文件,我这里以properties类型的配置文件为例来看几个案例。
1.修改Tomcat默认端口和默认访问路径
Tomcat默认端口是8080,我将之改为8081,默认访问路径是http://localhost:8080,我将之改为http://localhost:8081/helloboot,我们来看看这两个需求要怎么样通过简单的配置来实现。 很简单,在application.properties文件中添加如下代码:
server.context-path=/helloboot
server.port=808112
然后再启动Project,在浏览器中就得这样来访问了:

SpringMVC基础配置(注解配置)
参考地址:点击此处
SpringMVC常用配置
参考地址:点击此处
Spring常用配置
参考地址:点击此处
类型安全的配置
我们可以使用基于类型安全的配置方式,就是将properties属性和一个Bean关联在一起,这样使用起来会更加方便。我么来看看这种方式怎么实现。
1.在src/main/resources文件夹下创建文件:book.properties
文件内容如下:
book.name=红楼梦
book.author=曹雪芹
book.price=28123
2.创建Book Bean,并注入properties文件中的值
代码如下:
@Component
@ConfigurationProperties(prefix = "book",locations = "classpath:book.properties")
public class BookBean {
    private String name;
    private String author;
    private String price;

    public String getName() {
        return name;
    }

    public void setName(String name) {
        this.name = name;
    }

    public String getAuthor() {
        return author;
    }

    public void setAuthor(String author) {
        this.author = author;
    }

    public String getPrice() {
        return price;
    }

    public void setPrice(String price) {
        this.price = price;
    }
}
prefix是指前缀,location指定要注入文件的位置。
3.添加路径映射
在Controller中添加如下代码注入Bean:
@Autowired
private BookBean bookBean;
添加路径映射:
@RequestMapping("/book")
public String book() {
        return "Hello Spring Boot! The BookName is "+bookBean.getName()+";and Book Author is "+bookBean.getAuthor()+";and Book price is "+bookBean.getPrice();
}
运行效果如下:

日志配置
默认情况下Spring Boot使用Logback作为日志框架,也就是我们前面几篇博客中用到的打印日志方式,当然如果有需要我们可以手动配置日志级别以及日志输出位置,相比于我们在Spring容器中写的日志输出代码,这里的配置简直就是小儿科了,只需要在application.properties中添加如下代码:
logging.file=/home/sang/workspace/log.log
logging.level.org.springframework.web=debug12
上面表示配置日志输出位置,下面配置日志级别。
Profile配置问题
在 Spring常用配置 这篇文章中,我们已经介绍了Profile的作用,已经如何在Spring框架下使用Profile,但是当时小伙伴们看到了还是稍微有点麻烦,在Spring Boot 中系统提供了更为简洁的方式。全局Profile配置我们使用application-{profile}.properties来定义,然后在application.properties中通过spring.profiles.active来指定使用哪个Profile。OK,那么接下来我们来看一个简单的案例。
1.在src/main/resources文件夹下定义不同环境下的Profile配置文件,文件名分别为application-prod.properties和application-dev.properties,这两个前者表示生产环境下的配置,后者表示开发环境下的配置,如下:

application-prod.properties:
server.port=80811
application-dev.properties:
server.port=80801
然后在application.properties中进行简单配置,如下:
spring.profiles.active=dev1
这个表示使用开发环境下的配置。然后运行项目,我们得通过8080端口才可以访问:
 如果想换为生产环境,只需要把
spring.profiles.active=dev改为spring.profiles.active=prod即可,当然访问端口这是也变为8081了,如下:

从Session中获取域对象的三种方法
1. 利用@SessionAttribute进行获取
这是最简单直接的方法,可以直接在方法的参数中直接进行注入,如下:
//  可以直接从Session中抓取域对象
public Account login(@SessionAttribute Account account) {
    return account;
}
上面的方法虽然简单,但是唯一的缺点是Spring Framework 4.3之前的版本不支持。
2. 利用@SessionAttributes进行获取
与@SessionAttribute不同的是,@SessionAttributes不仅多了一个复数“s”,而且从Spring Framework 2.5版本就开始支持,此外@SessionAttributes还必须注解在类上,这样类里面的所有方法就可以直接通过@ModelAttribute获取域对象,所以总结起来,@SessionAttributes抓取域对象分为两步;
- 在类上添加注解@SessionAttributes;
- 在方法的参数中通过@ModelAttribute获取域对象;
@RestController
@SessionAttributes("account")
public class SecurityContextController {

    @RequestMapping("/account")
    public Account login(@ModelAttribute("account") Account account) {
        return account;
    }
}
此外,我们不妨把@SessionAttributes的官方说明重读一遍,以了解它的真正含义,如下:
This will typically list the names of model attributes
which should be transparently stored in the session or some conversational storage,
serving as form-backing beans.
Declared at the type level,
applying to the model attributes that the annotated handler class operates on.
大概意思是@SessionAttributes会列出存储在Session或会话中的域对象,就像表单的后台对象一样提供服务,并且必须注解在类型上,并应用于此类的域对象上。
3. 直接通过Session获取
这个更简单,直接通过HttpSession获取,但需要更多的类型判断与转换代码,如下:
@RequestMapping("/account")
public Account account(HttpSession session) {
    Object obj = session.getAttribute("account");
    if(obj instanceof Account) {
        Account account = (Account) obj;
        return account;
    }
    return null;
}
为了简化Session的调用,充分利用@ModelAttribute方法的初始化特性,我们还可以改进为如下的形式:
public class SecurityContextController {

    ThreadLocal<Account> authContext = new ThreadLocal<>();

    //  此方法会在每次请求前调用(这个类的处理方法)
    @ModelAttribute
    public void initUser(HttpSession session) {
        Object obj = session.getAttribute("account");
        if(obj instanceof Account) {
            Account user = (Account) obj;
            authContext.set(user);
        }
    }

    //  现在可直接使用存储的属性
    @RequestMapping("/getUser")
    public AegisUser get() {
        return authContext.get();
    }

}
结论
在Spring Boot中,从Session中获取域对象还是比较容易的,唯一可能引起误解或较难使用的只有@SessionAttributes,一定要记住它的二个使用步骤。
Controller接收POST请求
详情参考:spring boot get和post请求,以及requestbody为json串时候的处理
form-data格式
@RequestMapping(value = "/login", method = RequestMethod.POST)
public String loginByPost(@RequestParam(value = "name", required = true) String name,
                          @RequestParam(value = "pwd", required = true) String pwd) {
    System.out.println("hello post");
    return "hello post";
}
JSON格式
@RequestMapping(value = "/loginbean", method = RequestMethod.POST)
public String loginByPost2(@RequestBody LoginModel loginModel) {
    System.out.println("hello post,LoginModel,"+loginModel.getName());
    return "hello post,LoginModel";
}
通过@RequestBody注解,框架会把格式为JSON的串自动转换为对应的Bean对象。
将Spring Boot导出为JAR包
- 打包前确认项目可以正常运行,打开Project Structure 快捷键 Ctrl+Shift+Alt+S,或者点击下图图标

- 将代码打包,操作如下图所示:

- 如下图,module选择需要打包的项目名;Main Class 选择项目的主程序类;输出目录确保是空的,如果里面有一个MANIFEST.MF文件,要先删除掉

如果存在就删除,不存在就不必理会

- 现在将设置都搞定好后,就开始打包,如果初次打包按照以下流程

点击Build Artifacts后会出现下图的弹窗
 如果是初次打包点击build,如果不是请点击Rebuild
- 最后找到输出目录即可
 所有的输出文件都在out目录下,运行 java -jar xxxx.jar即可运行项目
访问HTML页面
在pom.xml加入
  <parent>
        <groupId>org.springframework.boot</groupId>
        <artifactId>spring-boot-starter-parent</artifactId>
        <version>1.5.2.RELEASE</version>
    </parent>
    <dependencies>
        <dependency>
            <groupId>org.springframework.boot</groupId>
            <artifactId>spring-boot-starter-web</artifactId>
        </dependency>
        <dependency>
            <groupId>org.mybatis.spring.boot</groupId>
            <artifactId>mybatis-spring-boot</artifactId>
            <version>1.2.0</version>
        </dependency>
        <dependency>
            <groupId>mysql</groupId>
            <artifactId>mysql-connector-java</artifactId>
        </dependency>
        <dependency>
            <groupId>org.springframework.boot</groupId>
            <artifactId>spring-boot-starter-data-jpa</artifactId>
        </dependency>

        <!--解析html包,,,,重要!!!!不然找不到页面-->
        <dependency>
          <groupId>net.sourceforge.nekohtml</groupId>
          <artifactId>nekohtml</artifactId>
          <version>1.9.22</version>
      </dependency>
        <dependency>
            <groupId>org.springframework.boot</groupId>
            <artifactId>spring-boot-starter-thymeleaf</artifactId>
        </dependency>
        <!--解析html包-->


    </dependencies>
在resources\templates\hello.html
<!DOCTYPE html>
<html xmlns="http://www.w3.org/1999/xhtml" xmlns:th="http://www.thymeleaf.org"
      xmlns:sec="http://www.thymeleaf.org/thymeleaf-extras-springsecurity3">
<head>
    <title>Hello World!</title>
</head>
<body>
<h1 th:inline="text">Hello.v.2</h1>
<p th:text="${hello}"></p>
</body>
</html>
在Controller中加入
@Controller  //注意这里必须为@Controller,不能是@RestController ,因为@RestController 返回的是字符串结果
//@RestController
public class HelloController {

    /**
     * 本地访问内容地址 :http://localhost:8080/hello
     *
     * @param map
     * @return
     */
    @RequestMapping("/hello")
    public String helloHtml(HashMap<String, Object> map) {
        map.put("hello", "欢迎进入HTML页面");
        return "/index.html";
    }
}
启动,然后输入localhost:8080/hello
会跳转到页面

注意:
- 必须加入thymeleaf包,不然找不到页面。
- Controller的注解必须是
@Controller而不是@RestController
有关thymeleaf的配置
配置application.properties
注意 1.结尾一定要有------ #thymeleaf end --------- 否则掉坑
2.#模板编码 spring.thymeleaf.mode=LEGACYHTML5
要想使用LEGACYHTML5这个编码格式必须引入 上面pom中‘避坑包’ 否则用不了
肯定有人要问为什么不用HTML5 ,你可以试试
因为你可能会发现在默认配置下,thymeleaf对.html的内容要求很严格,比如,
如果少最后的标签封闭符号/,就会报错而转到错误页。也比如你在使用Vue.js这样的库,然后有
这样的html代码, 也会被thymeleaf认为不符合要求而抛出错误。因此,建议增加下面这段:
spring.thymeleaf.mode = LEGACYHTML5 spring.thymeleaf.mode的默认值是HTML5,其实是一个很严格的检查,改为LEGACYHTML5可以得到一个可能更友好亲切的格式要求。
需要注意的是,LEGACYHTML5需要搭配一个额外的库NekoHTML才可用 也就时上文的避坑包
#<!-- 关闭thymeleaf缓存 开发时使用 否则没有实时画面-->
spring.thymeleaf.cache=false

## 检查模板是否存在,然后再呈现
spring.thymeleaf.check-template-location=true

#Content-Type值
spring.thymeleaf.content-type=text/html

#启用MVC Thymeleaf视图分辨率
spring.thymeleaf.enabled=true

## 应该从解决方案中排除的视图名称的逗号分隔列表
##spring.thymeleaf.excluded-view-names=

#模板编码
spring.thymeleaf.mode=LEGACYHTML5

# 在构建URL时预先查看名称的前缀.可根据实际情况填写,例如:classpath:/static/pages
spring.thymeleaf.prefix=classpath:/static/

# 构建URL时附加查看名称的后缀.
spring.thymeleaf.suffix=.html

# 链中模板解析器的顺序
#spring.thymeleaf.template-resolver-order= o

# 可以解析的视图名称的逗号分隔列表
#spring.thymeleaf.view-names=

#thymeleaf end
注意:静态资源,例如html、js、css等放在resources/static下面
thymeleaf介绍
Thymeleaf是一个XML/XHTML/HTML5模板引擎,可用于Web与非Web环境中的应用开发。它是一个开源的Java库,基于Apache License 2.0许可,由Daniel Fernández创建,该作者还是Java加密库Jasypt的作者。
Thymeleaf提供了一个用于整合Spring MVC的可选模块,在应用开发中,你可以使用Thymeleaf来完全代替JSP或其他模板引擎,如Velocity、FreeMarker等。Thymeleaf的主要目标在于提供一种可被浏览器正确显示的、格式良好的模板创建方式,因此也可以用作静态建模。你可以使用它创建经过验证的XML与HTML模板。相对于编写逻辑或代码,开发者只需将标签属性添加到模板中即可。接下来,这些标签属性就会在DOM(文档对象模型)上执行预先制定好的逻辑。
简单说, Thymeleaf 是一个跟 Velocity、FreeMarker 类似的模板引擎,它可以完全替代 JSP 。相较与其他的模板引擎,它有如下三个极吸引人的特点:
- Thymeleaf 在有网络和无网络的环境下皆可运行,即它可以让美工在浏览器查看页面的静态效果,也可以让程序员在服务器查看带数据的动态页面效果。这是由于它支持 html 原型,然后在 html 标签里增加额外的属性来达到模板+数据的展示方式。浏览器解释 html 时会忽略未定义的标签属性,所以 thymeleaf 的模板可以静态地运行;当有数据返回到页面时,Thymeleaf 标签会动态地替换掉静态内容,使页面动态显示。
- Thymeleaf 开箱即用的特性。它提供标准和spring标准两种方言,可以直接套用模板实现JSTL、 OGNL表达式效果,避免每套模板、改jstl、改标签的困扰。同时开发人员也可以扩展和创建自定义的方言。
- Thymeleaf 提供spring标准方言和一个与 SpringMVC 完美集成的可选模块,可以快速的实现表单绑定、属性编辑器、国际化等功能。
Spring Boot默认提供静态资源目录位置需置于classpath下,目录名需符合如下规则:
- /static
- /public
- /resources
- /META-INF/resources
举例:我们可以在src/main/resources/目录下创建static目录,在该目录放置一个图片文件(logo.png)。启动程序后,尝试访问http://localhost:8080/logo.png。如能显示图片,配置成功。(不需要http://localhost:8080/static/logo.png)
Spring Boot提供了默认配置的模板引擎主要有以下几种:
- Thymeleaf
- FreeMarker
- Velocity
- Groovy
- Mustache
Spring Boot建议使用这些模板引擎,避免使用JSP,若一定要使用JSP将无法实现Spring Boot的多种特性
当使用上述模板引擎中的任何一个后,它们默认的模板配置路径为:
src/main/resources/templates。当然也可以修改这个路径,具体如何修改,可在后续各模板引擎的配置属性中查询并修改。
在Spring Boot中使用Thymeleaf,只需要引入下面依赖,并在默认的模板路径src/main/resources/templates下编写模板文件即可完成。
<dependency>
    <groupId>org.springframework.boot</groupId>
    <artifactId>spring-boot-starter-thymeleaf</artifactId>
</dependency>
标准表达式语法
它们分为四类:
- 变量表达式
- 选择或星号表达式
- 文字国际化表达式
- URL表达式
变量表达式
变量表达式即OGNL表达式或Spring EL表达式(在Spring术语中也叫model attributes)。如下所示:
${session.user.name}
它们将以HTML标签的一个属性来表示:
<span th:text="${book.author.name}">
<li th:each="book : ${books}">
选择(星号)表达式
选择表达式很像变量表达式,不过它们用一个预先选择的对象来代替上下文变量容器(map)来执行,如下: *{customer.name}
被指定的object由th:object属性定义:
<div th:object="${book}">
  ...
  <span th:text="*{title}">...</span>
  ...
</div>
文字国际化表达式
文字国际化表达式允许我们从一个外部文件获取区域文字信息(.properties),用Key索引Value,还可以提供一组参数(可选).
#{main.title}
#{message.entrycreated(${entryId})}
可以在模板文件中找到这样的表达式代码:
<table>
  ...
  <th th:text="#{header.address.city}">...</th>
  <th th:text="#{header.address.country}">...</th>
  ...
</table>
URL表达式
URL表达式指的是把一个有用的上下文或会话信息添加到URL,这个过程经常被叫做URL重写。 @{/order/list}
URL还可以设置参数: @{/order/details(id=${orderId})}
相对路径: @{../documents/report}
让我们看这些表达式:
<form th:action="@{/createOrder}">
<a href="main.html" th:href="@{/main}">
变量表达式和星号表达有什么区别吗?
如果不考虑上下文的情况下,两者没有区别;星号语法评估在选定对象上表达,而不是整个上下文。
什么是选定对象?就是父标签的值,如下:
<div th:object="${session.user}">
  <p>Name: <span th:text="*{firstName}">Sebastian</span>.</p>
  <p>Surname: <span th:text="*{lastName}">Pepper</span>.</p>
  <p>Nationality: <span th:text="*{nationality}">Saturn</span>.</p>
</div>
这是完全等价于:
<div th:object="${session.user}">
    <p>Name: <span th:text="${session.user.firstName}">Sebastian</span>.</p>
    <p>Surname: <span th:text="${session.user.lastName}">Pepper</span>.</p>
    <p>Nationality: <span th:text="${session.user.nationality}">Saturn</span>.</p>
</div>
当然,美元符号和星号语法可以混合使用:
<div th:object="${session.user}">
    <p>Name: <span th:text="*{firstName}">Sebastian</span>.</p>
    <p>Surname: <span th:text="${session.user.lastName}">Pepper</span>.</p>
    <p>Nationality: <span th:text="*{nationality}">Saturn</span>.</p>
</div>
表达式支持的语法
字面(Literals)
- 文本文字(Text literals): ‘one text’, ‘Another one!’,…
- 数字文本(Number literals): 0, 34, 3.0, 12.3,…
- 布尔文本(Boolean literals): true, false
- 空(Null literal): null
- 文字标记(Literal tokens): one, sometext, main,…
文本操作(Text operations)
- 字符串连接(String concatenation): +
- 文本替换(Literal substitutions): |The name is ${name}|
算术运算(Arithmetic operations)
- 二元运算符(Binary operators): +, -, *, /, %
- 减号(单目运算符)Minus sign (unary operator): -
布尔操作(Boolean operations)
- 二元运算符(Binary operators):and, or
- 布尔否定(一元运算符)Boolean negation (unary operator):!, not
比较和等价(Comparisons and equality)
- 比较(Comparators): >, <, >=, <= (gt, lt, ge, le)
- 等值运算符(Equality operators):==, != (eq, ne)
条件运算符(Conditional operators)
- If-then: (if) ? (then)
- If-then-else: (if) ? (then) : (else)
- Default: (value) ?: (defaultvalue)
所有这些特征可以被组合并嵌套:
'User is of type ' + (${user.isAdmin()} ? 'Administrator' : (${user.type} ?: 'Unknown'))
常用th标签
| 关键字 | 功能介绍 | 案例 |
|---|---|---|
| th:id | 替换id | <input th:id="'xxx' + ${collect.id}"/> |
| th:text | 文本替换 | <p th:text="${collect.description}">description</p> |
| th:utext | 支持html的文本替换 | <p th:utext="${htmlcontent}">conten</p> |
| th:object | 替换对象 | <div th:object="${session.user}"> |
| th:value | 属性赋值 | <input th:value="${user.name}" /> |
| th:with | 变量赋值运算 | <div th:with="isEven=${prodStat.count}%2==0"></div> |
| th:style | 设置样式 | th:style="'display:' + @{(${sitrue} ? 'none' : 'inline-block')} + ''" |
| th:onclick | 点击事件 | th:onclick="'getCollect()'" |
| th:each | 属性赋值 | tr th:each="user,userStat:${users}"> |
| th:if | 判断条件 | <a th:if="${userId == collect.userId}" > |
| th:unless | 和th:if判断相反 | <a th:href="@{/login}" th:unless=${session.user != null}>Login</a> |
| th:href | 链接地址 | <a th:href="@{/login}" th:unless=${session.user != null}>Login</a> /> |
| th:switch | 多路选择 配合th:case 使用 | <div th:switch="${user.role}"> |
| th:case | th:switch的一个分支 | <p th:case="'admin'">User is an administrator</p> |
| th:fragment | 布局标签,定义一个代码片段,方便其它地方引用 | <div th:fragment="alert"> |
| th:include | 布局标签,替换内容到引入的文件 | <head th:include="layout :: htmlhead" th:with="title='xx'"></head> /> |
| th:replace | 布局标签,替换整个标签到引入的文件 | <div th:replace="fragments/header :: title"></div> |
| th:selected | selected选择框 选中 | th:selected="(${xxx.id} == ${configObj.dd})" |
| th:src | 图片类地址引入 | <img class="img-responsive" alt="App Logo" th:src="@{/img/logo.png}" /> |
| th:inline | 定义js脚本可以使用变量 | <script type="text/javascript" th:inline="javascript"> |
| th:action | 表单提交的地址 | <form action="subscribe.html" th:action="@{/subscribe}"> |
| th:remove | 删除某个属性 | <tr th:remove="all"> 1.all:删除包含标签和所有的孩子。2.body:不包含标记删除,但删除其所有的孩子。3.tag:包含标记的删除,但不删除它的孩子。4.all-but-first:删除所有包含标签的孩子,除了第一个。5.none:什么也不做。这个值是有用的动态评估。 |
| th:attr | 设置标签属性,多个属性可以用逗号分隔 | 比如 th:attr="src=@{/image/aa.jpg},title=#{logo}",此标签不太优雅,一般用的比较少。 |
还有非常多的标签,这里只列出最常用的几个,由于一个标签内可以包含多个th:x属性,其生效的优先级顺序为: include,each,if/unless/switch/case,with,attr/attrprepend/attrappend,value/href,src ,etc,text/utext,fragment,remove。
几种常用的使用方法
1、赋值、字符串拼接
description
字符串拼接还有另外一种简洁的写法
2、条件判断 If/Unless
Thymeleaf中使用th:if和th:unless属性进行条件判断,下面的例子中,<a>标签只有在th:if中条件成立时才显示:
<a th:if="${myself=='yes'}" > </i> </a>
<a th:unless=${session.user != null} th:href="@{/login}" >Login</a>
th:unless于th:if恰好相反,只有表达式中的条件不成立,才会显示其内容。
也可以使用 (if) ? (then) : (else) 这种语法来判断显示的内容
3、for 循环
 <tr  th:each="collect,iterStat : ${collects}">
     <th scope="row" th:text="${collect.id}">1</th>
     <td >
        <img th:src="${collect.webLogo}"/>
     </td>
     <td th:text="${collect.url}">Mark</td>
     <td th:text="${collect.title}">Otto</td>
     <td th:text="${collect.description}">@mdo</td>
     <td th:text="${terStat.index}">index</td>
 </tr>
iterStat称作状态变量,属性有:
- index:当前迭代对象的index(从0开始计算)
- count: 当前迭代对象的index(从1开始计算)
- size:被迭代对象的大小
- current:当前迭代变量
- even/odd:布尔值,当前循环是否是偶数/奇数(从0开始计算)
- first:布尔值,当前循环是否是第一个
- last:布尔值,当前循环是否是最后一个
4、URL
URL在Web应用模板中占据着十分重要的地位,需要特别注意的是Thymeleaf对于URL的处理是通过语法@{...}来处理的。 如果需要Thymeleaf对URL进行渲染,那么务必使用th:href,th:src等属性,下面是一个例子
<!-- Will produce 'http://localhost:8080/standard/unread' (plus rewriting) -->
 <a  th:href="@{/standard/{type}(type=${type})}">view</a>

<!-- Will produce '/gtvg/order/3/details' (plus rewriting) -->
<a href="details.html" th:href="@{/order/{orderId}/details(orderId=${o.id})}">view</a>
设置背景
<div th:style="'background:url(' + @{/<path-to-image>} + ');'"></div>
根据属性值改变背景
<div class="media-object resource-card-image" th:style="'background:url(' + @{(${collect.webLogo}=='' ? 'img/favicon.png' : ${collect.webLogo})} + ')'" ></div>
几点说明:
- 上例中URL最后的
(orderId=${o.id})表示将括号内的内容作为URL参数处理,该语法避免使用字符串拼接,大大提高了可读性 @{...}表达式中可以通过{orderId}访问Context中的orderId变量@{/order}是Context相关的相对路径,在渲染时会自动添加上当前Web应用的Context名字,假设context名字为app,那么结果应该是/app/order
5、内联js
内联文本:[[…]]内联文本的表示方式,使用时,必须先用th:inline=”text/javascript/none”激活,th:inline可以在父级标签内使用,甚至作为body的标签。内联文本尽管比th:text的代码少,不利于原型显示。
js附加代码:
/*[+
var msg = 'This is a working application';
+]*/
js移除代码:
/[- /
var msg = 'This is a non-working template';
/ -]/
6、内嵌变量
为了模板更加易用,Thymeleaf还提供了一系列Utility对象(内置于Context中),可以通过#直接访问:
- dates : java.util.Date的功能方法类。
- calendars : 类似#dates,面向java.util.Calendar
- numbers : 格式化数字的功能方法类
- strings : 字符串对象的功能类,contains,startWiths,prepending/appending等等。
- objects: 对objects的功能类操作。
- bools: 对布尔值求值的功能方法。
- arrays:对数组的功能类方法。
- lists: 对lists功能类方法
- sets
- maps
- …
下面用一段代码来举例一些常用的方法:
dates
/*
Format date with the specified pattern
Also works with arrays, lists or sets
*/
${#dates.format(date, 'dd/MMM/yyyy HH:mm')}
${#dates.arrayFormat(datesArray, 'dd/MMM/yyyy HH:mm')}
${#dates.listFormat(datesList, 'dd/MMM/yyyy HH:mm')}
${#dates.setFormat(datesSet, 'dd/MMM/yyyy HH:mm')}
/*
Create a date (java.util.Date) object for the current date and time
*/
${#dates.createNow()}
/*
Create a date (java.util.Date) object for the current date (time set to 00:00)
*/
${#dates.createToday()}
strings
/*
Check whether a String is empty (or null). Performs a trim() operation before check
Also works with arrays, lists or sets
*/
${#strings.isEmpty(name)}
${#strings.arrayIsEmpty(nameArr)}
${#strings.listIsEmpty(nameList)}
${#strings.setIsEmpty(nameSet)}
/*
Check whether a String starts or ends with a fragment
Also works with arrays, lists or sets
*/
${#strings.startsWith(name,'Don')} // also array, list and set*
${#strings.endsWith(name,endingFragment)} // also array, list and set*
/*
Compute length
Also works with arrays, lists or sets
*/
${#strings.length(str)}
/*
Null-safe comparison and concatenation
*/
${#strings.equals(str)}
${#strings.equalsIgnoreCase(str)}
${#strings.concat(str)}
${#strings.concatReplaceNulls(str)}
/*
Random
*/
${#strings.randomAlphanumeric(count)}
使用thymeleaf布局
使用thymeleaf布局非常的方便
定义代码片段
在页面任何地方引入:
th:include 和 th:replace区别,include只是加载,replace是替换
返回的HTML如下:
© 2016
下面是一个常用的后台页面布局,将整个页面分为头部,尾部、菜单栏、隐藏栏,点击菜单只改变content区域的页面
任何页面想使用这样的布局值只需要替换中见的 content模块即可
...
也可以在引用模版的时候传参
layout 是文件地址,如果有文件夹可以这样写 fileName/layout:htmlhead
htmlhead 是指定义的代码片段 如 th:fragment=”copy”
源码案例
这里有一个开源项目几乎使用了这里介绍的所有标签和布局,大家可以参考: cloudfavorites。
全局异常捕获处理
需要用到的相关注解:
@ControllerAdvice,该注解是spring2.3以后新增的一个注解,主要是用来Controller的一些公共的需求的低侵入性增强提供辅助,作用于@RequestMapping标注的方法上。@ExceptionHandler,该注解是配合@ExceptionHandler一起使用的注解,自定义错误处理器,可自己组装json字符串,并返回到页面。@ResponseBody,返回JSON格式数据。
@ControllerAdvice
public class ExceptionController {
    @ExceptionHandler(RuntimeException.class)
    @ResponseBody
    public Map<String,Object> dealError(HttpServletRequest request, Exception exception){
        Map<String,Object> result=new HashMap<>();
        //System.out.println("我报错了:"+exception.getLocalizedMessage());
        //System.out.println("我报错了:"+exception.getCause());
        //System.out.println("我报错了:"+exception.getSuppressed());
        //System.out.println("我报错了:"+exception.getMessage());
        //System.out.println("我报错了:"+exception.getStackTrace());
        result.put("ErrorCode","500");
        result.put("ErrorMsg","服务器异常,信息:"+exception.getLocalizedMessage());

        return result;
    }
}
Spring Boot项目打成jar包后关于配置文件的外部化配置
在未进行任何处理的情况下,Spring Boot会默认使用项目中的
application.properties或者application.yml来读取项目所需配置。
访问命令行属性
在默认的情况下, SpringApplication 会将任何命令行选项参数(以 -- 开头,例如: --server.port=9000)转换为 property 并添加到Spring环境当中。
例如,启动项目的时候指定端口:
java -jar SNAPSHOT.jar --server.port=8081
Spring Boot使用了一个非常特殊的 PropertySource 命令,目的是为了让属性值的重写按照一定的顺序来,而在这个顺序当中,命令行属性总是优先于其他属性源。
当然,如果不想将命令行属性添加到Spring环境当中,可以使用以下代码来禁用它们。
SpringApplication.setAddCommandLineProperties(false);
应用程序属性文件
SpringApplication 将从 application.properties 以下位置的文件中加载属性并且将其添加到Spring的环境当中:
当前目录下的
/config子目录当前目录
classpath中的
/config目录classpath根目录
该列表按照优先级的顺序排列(在列表中较高的位置定义的属性将会覆盖在较低位置定义的属性)。
如果您不喜欢
application.properties作为配置文件名,则可以通过指定spring.config.name环境属性来切换到另一个名称。还可以使用spring.config.location环境属性(以逗号分隔的目录位置列表或文件路径)引用显式位置。 比如:
java -jar myproject.jar --spring.config.name = myproject1
java -jar myproject.jar --spring.config.location = classpath:/default.properties,classpath:/override.properties1
java -jar -Dspring.config.location=D:\speech\default.properties analysis-speech-tool-0.0.1-SNAPSHOT.jar1
问题解决
Ajax发送JSON请求出错
{"timestamp":"2018-04-19T12:41:07.106+0000","status":415,"error":"Unsupported Media Type","message":"Content type 'application/x-www-form-urlencoded;charset=UTF-8' not supported","path":"/servlet/CommonHttpHandler"}
Ajax进行POST请求时,默认的Content-type:'application/x-www-form-urlencoded;charset=UTF-8'
解决方案:
在“$.ajax({ ”之前,需要加上:contentType : 'application/json'
    $.ajax({
        contentType : 'application/json',
        url: xxxxxxxx,
        type: "post",
        async: true,
        data: JSON.stringify({"ClassName": className, "MethodName": methodName,"JsonText": paramJsonArr}),

        complete: function (data, textStatus, jqXHR) {

        }
    });//end $.ajax
};//end Ajax
Ajax数据格式问题
Caused by: com.fasterxml.jackson.core.JsonParseException: Unrecognized token '——属性名————': was expecting ('true', 'false' or 'null')
解决方案:
使用JSON.stringify()方法对Ajax的
data进行处理,例如:data: JSON.stringify({"ClassName": className, "MethodName": methodName,"JsonText": paramJsonArr})
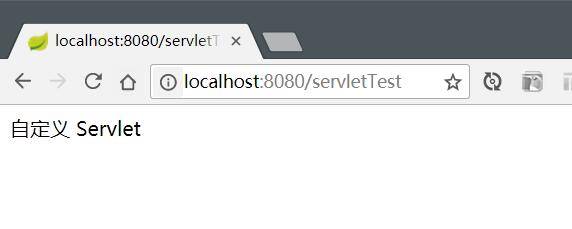
自定义 Servlet
1、编写 Servlet
public class ServletTest extends HttpServlet {

    @Override
    protected void doGet(HttpServletRequest req, HttpServletResponse resp) throws ServletException, IOException {
        doPost(req, resp);
    }

    @Override
    protected void doPost(HttpServletRequest req, HttpServletResponse resp) throws ServletException, IOException {
        resp.setContentType("text/html;charset=utf-8");
        resp.getWriter().write("自定义 Servlet");
    }

}
2、注册 Servlet
将 Servelt 注册成 Bean。在上文创建的 WebConfig 类中添加如下代码:
@Bean
public ServletRegistrationBean servletRegistrationBean() {
    return new ServletRegistrationBean(new ServletTest(),"/servletTest");
}
日志格式化
Spring Boot在所有内部日志中使用Commons Logging,但是默认配置也提供了对常用日志的支持,如:Java Util Logging,Log4J, Log4J2和Logback。每种Logger都可以通过配置使用控制台或者文件输出日志内容。 Spring Boot默认的日志输出格式如下:
2014-03-05 10:57:51.112  INFO 45469 --- [           main] org.apache.catalina.core.StandardEngine  : Starting Servlet Engine: Apache Tomcat/7.0.52
2014-03-05 10:57:51.253  INFO 45469 --- [ost-startStop-1] o.a.c.c.C.[Tomcat].[localhost].[/]       : Initializing Spring embedded WebApplicationContext
2014-03-05 10:57:51.253  INFO 45469 --- [ost-startStop-1] o.s.web.context.ContextLoader            : Root WebApplicationContext: initialization completed in 1358 ms
2014-03-05 10:57:51.698  INFO 45469 --- [ost-startStop-1] o.s.b.c.e.ServletRegistrationBean        : Mapping servlet: 'dispatcherServlet' to [/]
2014-03-05 10:57:51.702  INFO 45469 --- [ost-startStop-1] o.s.b.c.embedded.FilterRegistrationBean  : Mapping filter: 'h
默认情况下,Spring Boot只会将日志记录到控制台而不会写进日志文件。可以通过logging.level.*=LEVEL('LEVEL'是TRACE, DEBUG, INFO, WARN, ERROR, FATAL, OFF中的一个)设置的日志级别。如果除了输出到控制台你还想写入到日志文件,那你需要设置logging.file或logging.path属性。
下面是一个使用YML配置打印路径及级别的例子:
logging:
  level:
    org.hibernate: ERROR
    org.springframework : DEBUG

  path: /logs
  file: myapp.log